
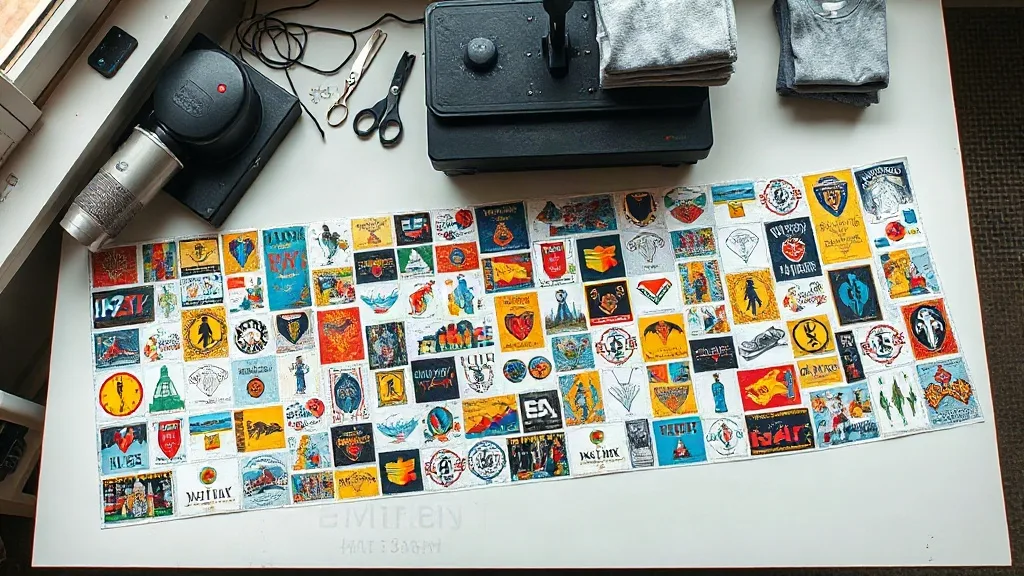
Anyone who prints shirts in small batches eventually runs into the same arithmetic problem. A customer wants twelve pieces, each with a different design. Twelve separate print setups mean twelve times the film, twelve times the powder application, and twelve times the chance that one transfer comes out slightly off. The DTF Gangsheet format exists to solve exactly that problem, and once you understand how a sheet is built, the whole workflow gets cheaper and more predictable.
What a DTF gangsheet actually is
Direct-to-film printing transfers a design onto a PET film, covers it with a hot-melt adhesive powder, cures it, and then presses it onto fabric. A gangsheet takes that same process and arranges many designs on one continuous roll of film. Instead of one image per print job, you get a packed layout, often anywhere from 22 to 60 inches wide and as long as your order requires.
The practical effect is simple: the fixed costs of a print run, meaning the film feed, the powder station, and the curing pass, get spread across dozens of images rather than one. For a shop printing mixed orders, that is the difference between a job that barely breaks even and one that leaves room for a healthy margin.
Why the format suits apparel decorators
Screen printing rewards volume of a single design. DTF rewards variety. A gangsheet layout means a shop can print a size run of one logo, a handful of team names, and a few one-off customer requests on the same sheet. There is no screen to burn, no color separation to manage, and no minimum tied to a specific design. The sheet is the unit of production, not the individual artwork.
How a sheet is laid out
A well-built sheet is a packing puzzle. The goal is to fill the printable width with designs rotated and nested so that the leftover film area is as small as possible. Most transfer suppliers handle this automatically from a file you upload, but understanding the logic helps you prepare artwork that packs tightly.
Spacing and trim allowance
Every design needs a small gap around it, usually a few millimeters, so that cutting or trimming does not clip the transfer edge. If you plan to cut by hand, leave a little extra. If you plan to use a cutter plotter with registration marks, tell your supplier in advance, because those marks take up sheet space and affect how much you can fit.
Grain and orientation
Rotating a long, narrow design by ninety degrees often frees up a surprising amount of room. A skilled layout will rotate individual pieces to fill awkward gaps rather than leaving a strip of unused film at the end of a row. If you are arranging your own file, do not be precious about orientation. The transfer does not care which way it sits on the film.
Preparing artwork that prints cleanly
Most transfer problems start in the file, not in the press. A few habits prevent the majority of them.
- Work at 300 DPI at final print size. Scaling a small file up after the fact softens edges and creates fuzzy outlines.
- Keep a transparent background. DTF prints white ink as a base layer, so any stray white box behind your design will show up on the garment.
- Account for fine detail. Hairline strokes and tiny lettering can break up during powdering. If a detail is thinner than a millimeter at print size, it is worth thickening.
- Set up a white underbase deliberately. For dark garments you usually want a white layer behind the color, but for light garments you may prefer a thinner base so the print stays soft.
- Flatten and save as a high-quality PNG or PDF. Live text and unmerged layers can render differently than you expect.
One more thing worth doing: print a small test sheet before committing to a large one. A single quarter-sheet with your most detailed design will tell you more about how a supplier handles edges, color density, and powder coverage than any specification sheet.
What to check when a sheet arrives
Inspecting a delivery takes a few minutes and saves a lot of reprints. Unroll the sheet in good light and look for three things.
- Powder coverage. The adhesive should look even and matte across the whole design. Patchy or shiny spots mean the powder did not settle properly.
- Edge integrity. Fine lines and small text should be crisp, not ragged or partially missing.
- Color accuracy. Compare against your approved proof, keeping in mind that film colors look slightly different from the final pressed result.
Store unused transfers flat or loosely rolled, away from heat and humidity. Powdered transfers are sensitive to moisture, and a sheet left in a damp corner of a workshop can lose adhesion before it ever reaches a press.
Pressing a transfer from a sheet
Cut the piece from the sheet with a small border, then trim closer if the design allows. Preheat the garment briefly to remove moisture, place the transfer with the printed side facing up, and press at roughly 300 to 320 degrees Fahrenheit for around 10 to 15 seconds with medium pressure. Peel the film warm, and then cover the design with parchment or a Teflon sheet and press again for a few seconds to lock the adhesive into the fabric weave.
Fabric type changes the recipe. Cotton tolerates higher heat and longer dwell. Blends and synthetics need lower temperatures, and stretchy fabrics benefit from a slightly longer second press so the transfer can move with the material instead of cracking. Keep a small notebook of what worked for each fabric you run regularly. After a few weeks it becomes the most useful document in the shop.
Cost and waste considerations
The economics of a gangsheet come down to film utilization. A sheet that is 80 percent filled costs far less per design than one that is 50 percent filled, because the film, powder, and curing time are shared. This is why batching matters. Rather than ordering one design at a time, collect orders for a week and build a single dense sheet.
There is a tradeoff in trimming labor. Densely packed sheets with irregular shapes can take longer to cut apart, especially by hand. If your volume justifies it, a cutter plotter with registration marks pays for itself quickly. If not, group simple rectangular designs together so the cutting is fast and predictable.
When a gangsheet is the wrong choice
If you need five hundred identical shirts with one design, traditional screen printing will usually beat DTF on cost per unit. Gangsheets shine when the designs vary, the quantities are modest, or the order includes names, numbers, and one-off artwork. Choosing the right process for the job is more valuable than loyalty to any single method.
Frequently asked questions
How many designs fit on a DTF gangsheet?
It depends entirely on design size and how tightly the layout packs. A sheet filled with small chest logos can hold dozens of pieces, while a sheet of large back prints may hold only a few. The useful measure is total printable area, not a fixed count.
Can I mix different fabrics and garment colors on one sheet?
Yes. The transfer itself does not change based on the garment it will be applied to, so you can print designs destined for cotton tees, poly blends, and canvas bags on the same sheet. What changes is the pressing recipe at application time, not the print.
How long can I store unused transfers?
Stored flat in a cool, dry place and away from direct sunlight, most transfers stay usable for several months. Humidity is the main enemy, so keep them out of damp storage rooms and sealed if your workshop gets humid in summer.
Do I need special equipment to use a gangsheet?
A heat press is essential. Scissors or a trimmer handle separation, and a cutter plotter is optional but helpful at higher volumes. You do not need a DTF printer of your own if you order sheets from a supplier, which makes the format accessible to small shops and solo sellers.
What file format should I upload for a gangsheet order?
A flattened PNG at 300 DPI with a transparent background is the safest choice for most suppliers. PDF files with vector artwork also work well and often keep fine detail sharper. Avoid JPEGs, which cannot hold transparency and introduce compression artifacts around edges.