
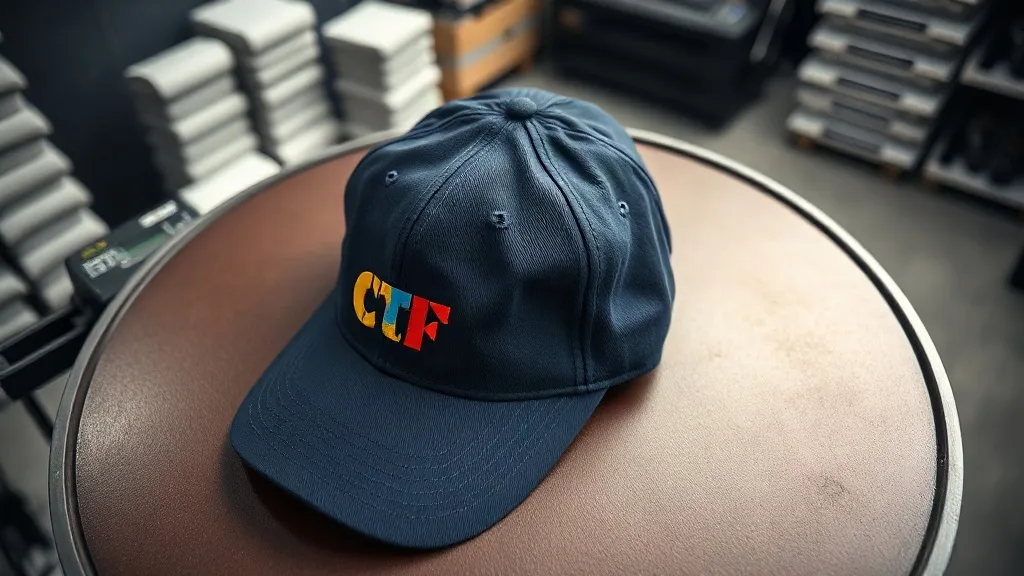
Applying dtf transfers to hats and caps is one of those tasks that looks simple until you try it. The curved surface, structured front panels, and mixed materials of most caps can turn a routine heat press job into a frustrating experiment. Yet with the right technique, dtf can deliver crisp, vibrant logos on everything from trucker hats to beanies, and it often outperforms embroidery for detailed multi-color designs. This guide walks through the practical steps, settings, and pitfalls so you can add caps to your product line with confidence.
Why DTF Works Well for Caps and Hats
DTF transfers offer a few advantages that matter specifically for headwear. First, they can print fine details, gradients, and photographic elements that embroidery simply cannot reproduce without excessive stitch counts and cost. Second, the transfer film is thin and flexible, so it conforms to curved surfaces better than screen-printed plastisol or vinyl. Third, you can apply DTF to a wide range of cap materials, including cotton twill, polyester blends, and even some nylon fabrics, provided you manage heat carefully.
Another practical benefit: DTF does not require weeding or masking, so small runs and one-off custom caps become economically viable. A shop that already uses DTF for shirts can extend the same workflow to headwear without buying new equipment beyond a hat press or a curved platen attachment.
Choosing the Right Caps for DTF Application
Not every cap takes a DTF transfer equally well. The fabric composition and structure of the front panel are the biggest factors. Here is what to look for:
- Cotton or cotton-rich twill: The most forgiving option. Cotton holds the adhesive well and tolerates moderate heat without scorching.
- Polyester blends: Common in performance caps and trucker hats. Polyester can handle lower temperatures, but excessive heat may cause the fabric to glaze or the transfer to bond too aggressively, leading to a stiff hand feel.
- Nylon: Often used in outdoor caps. Nylon requires careful temperature control because it can melt or shrink. Always test on a spare cap.
- Structured vs. unstructured: Structured caps with buckram backing provide a firm surface that helps the transfer adhere evenly. Unstructured caps can be trickier because the fabric moves during pressing.
Also consider the cap's color. DTF transfers are opaque, so they work on dark and light backgrounds, but a white underbase is standard in DTF printing. That means the transfer will have a slight white edge if not trimmed closely. For caps, trimming the transfer close to the design is especially important to avoid visible film on the curved surface.
Preparing the Cap and Transfer
Preparation is where most cap applications succeed or fail. Start by pre-pressing the cap for a few seconds to remove moisture and wrinkles. Use a hat press or a curved platen that matches the cap's shape. A flat press can work for unstructured caps if you use a pressing pillow, but a dedicated hat press gives more consistent pressure.
Trim the DTF transfer close to the design, leaving about 1 to 2 millimeters of margin. Excess film can create hard edges and may not conform to the curve. If your design has fine details, be careful not to cut into the printed area.
Position the transfer on the cap. For front panels, center the design both horizontally and vertically. A common mistake is placing the design too high, which makes it look off when the cap is worn. A good rule of thumb is to leave about 1.5 to 2 centimeters from the bottom edge of the front panel to the bottom of the design.
Heat Press Settings for Caps
Settings vary by transfer supplier and cap material, but here are starting points that work for most cotton and poly-blend caps:
- Temperature: 300°F to 320°F (150°C to 160°C). Start at the lower end for polyester and nylon.
- Pressure: Medium to firm. You need enough pressure to press the transfer into the fabric texture, but too much can flatten the cap's structure.
- Time: 10 to 15 seconds for the press, followed by a 5-second peel. Some films are hot-peel, others cold-peel. Check your supplier's instructions.
Always use a protective sheet or parchment paper over the transfer to prevent sticking and scorching. After peeling the film, post-press the design for 5 to 10 seconds with the protective sheet to improve adhesion and durability.
Common Problems and How to Fix Them
Even with good settings, issues can arise. Here are the most frequent ones and their solutions:
Transfer Lifting at the Edges
This usually means insufficient pressure or time. Increase pressure slightly and add 2 to 3 seconds to the press time. Make sure the cap is positioned so the design area is fully supported by the platen.
Scorching or Glazing
Too much heat, especially on polyester. Lower the temperature by 10°F to 15°F and check the cap after each press. A scorched cap cannot be recovered, so always test on a spare.
Stiff Hand Feel
DTF transfers inherently have a slight hand, but excessive pressure or heat can make it worse. Use the minimum pressure needed for adhesion and avoid over-pressing. On lightweight caps, a thinner transfer film can help.
Design Distortion
If the design looks stretched or warped, the cap may have shifted during pressing. Use a hat press with a secure clamp or hold the cap firmly in place. Pre-pressing the cap helps it hold its shape.
Durability and Wash Care
A properly applied DTF transfer on a cap should withstand normal wear and occasional cleaning. Advise your customers to hand wash caps or use a gentle cycle in a mesh bag, and to air dry rather than machine dry. Avoid ironing directly over the design. With these precautions, the print will stay vibrant and adhered for the life of the cap.
For high-volume orders, consider doing a wash test on a sample cap to verify adhesion. This is especially important if you are using a new cap supplier or a different transfer film.
When to Choose DTF Over Embroidery for Caps
Embroidery remains the classic choice for caps, but DTF has clear advantages for certain designs. Choose DTF when:
- The design has many colors or fine details.
- You need a photographic or gradient effect.
- You are producing small quantities and want to avoid embroidery setup costs.
- The cap material is difficult to embroider, such as thin or unstructured fabrics.
Embroidery still wins for a premium, textured look and for designs that benefit from a raised stitch effect. Many shops offer both and let the customer decide based on the artwork.
Frequently Asked Questions
Can I use a regular flat heat press for DTF on caps?
Yes, but you will need a pressing pillow or a curved platen attachment to support the cap's shape. A dedicated hat press gives more consistent results, especially for structured caps.
What temperature should I use for DTF on polyester caps?
Start at 300°F (150°C) and increase only if needed. Polyester is sensitive to heat, so always test on a spare cap and use a protective sheet.
How do I prevent the transfer from peeling off the cap?
Ensure adequate pressure and time, and post-press the design after peeling. Also, make sure the cap is clean and dry before application. Wash tests can help verify durability.
Can DTF transfers be applied to the back or side of a cap?
Yes, but the curved surface makes it more challenging. Use a smaller design and a hat press with a curved platen. For side placements, you may need to press in stages or use a specialized attachment.
Is DTF suitable for beanies?
DTF can work on beanies, but the stretchy knit fabric requires a transfer film with good elasticity. Use a lower temperature and pressure, and consider a stretchable DTF film designed for knitwear.