
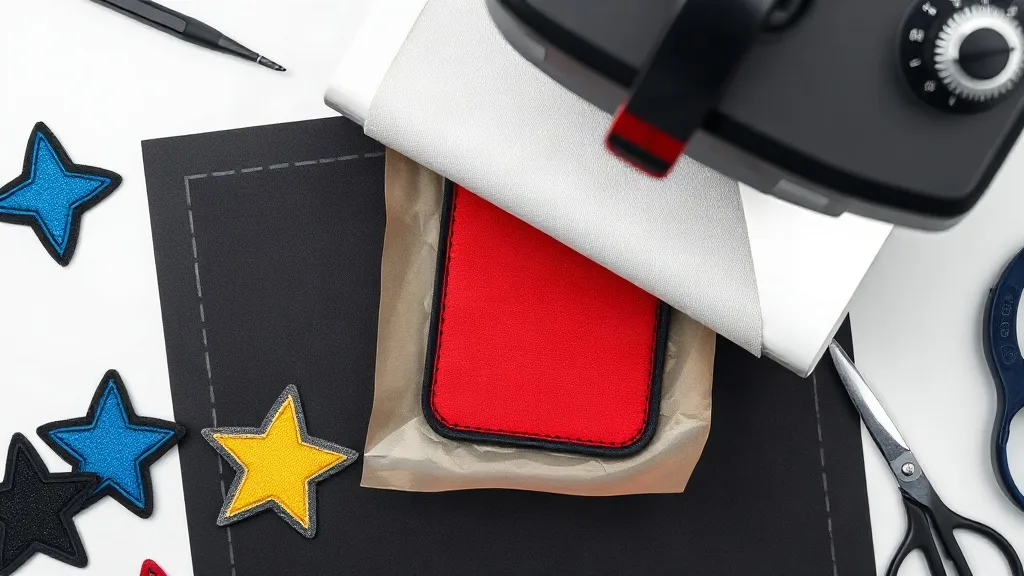
Custom patches have quietly become one of the most requested add-ons in the decorated apparel world. Brands want them for beanies, jackets, and caps. Schools want them for uniforms. Local clubs want them for morale gear. And if you already run a heat press, you can fill those orders without adding embroidery machines or minimums. The key is understanding how dtf transfers behave on patch substrates and where the process saves you time and money.
Why DTF Transfers Fit Patch Production
Traditional embroidered patches are beautiful, but they come with setup costs, thread color limits, and lead times that can stretch into weeks. Woven patches are similarly slow for small runs. DTF transfers flip that equation. You print the design digitally, powder it, cure it, and press it onto a patch blank. No digitizing, no thread charts, no minimums beyond what your printer can handle in a single run.
That flexibility matters when a customer asks for twelve patches with a full-color logo one week and fifty patches with a different design the next. You can gang multiple patch designs onto one sheet, press them in batches, and ship quickly. For shops already offering dtf transfers, adding patch production is a natural extension of the same workflow.
Choosing the Right Patch Blank
Not every patch blank accepts DTF film the same way. The substrate determines adhesion, hand feel, and durability. Here is what to consider before you promise a customer a finished patch.
Fabric Composition
Cotton and cotton-poly blends are the easiest to work with. They absorb the adhesive and allow the film to bond cleanly. Nylon and other slick synthetics can be tricky because the adhesive may not grab as aggressively. If you must use nylon, look for blanks with a twill face or a heat-activated adhesive backing that accepts low-temperature pressing.
Surface Texture
Smooth twill is ideal. Heavy canvas or burlap-style patches have deep valleys that can trap air under the film, leading to incomplete adhesion. If you love the rustic look of textured patches, plan to press at a slightly higher pressure and use a cover sheet to distribute heat evenly.
Edge Finish
Merrowed edges and laser-cut edges both work, but the film should not overlap the edge. Trim your transfer with a small margin inside the stitch line so the adhesive does not gum up the needle or laser-cut edge during finishing.
Preparing Artwork for Patch-Sized Prints
Patch designs are small, often under three inches wide. That scale changes how you prepare artwork. Fine details that look great on a t-shirt may disappear on a patch. Keep these guidelines in mind.
- Minimum line weight: Stay at or above 0.5 pt for lines and 6 pt for text. Anything thinner risks filling in or breaking apart.
- Color mode: Work in RGB for DTF, but proof in CMYK to catch shifts. Bright neons and deep navies are common problem areas.
- Bleed and trim: Add a 1/16-inch bleed beyond the final patch shape so the film can be trimmed cleanly after pressing.
- Background: Remove any background from the art. DTF prints white ink automatically, but a transparent background keeps the film from showing around the edges.
If you offer dtf transfers as a service, create a patch-specific template that customers can download. It reduces back-and-forth and sets expectations about line weights and color.
Pressing DTF Transfers onto Patch Blanks
Pressing a patch is not the same as pressing a shirt. The small surface area and rigid backing change how heat and pressure behave. Here is a repeatable process that works across most patch blanks.
Step 1: Pre-Press the Blank
Lay the patch blank on your press and give it a short pre-press, about five seconds at 300°F (150°C). This removes moisture and flattens any curl in the fabric. Skipping this step is the most common cause of peeling corners.
Step 2: Position and Tack
Place the transfer face down on the patch. Use a heat-resistant tape or a light touch with your finger to hold it in place. If the patch is small, a pair of tweezers helps you avoid burning your fingertips.
Step 3: Press
Press at 300°F to 310°F (150°C to 155°C) for 10 to 12 seconds with medium pressure. The exact time depends on your press and the film manufacturer, so run a test patch first. Too much time can cause the film to wrinkle; too little leaves the adhesive undercured.
Step 4: Peel
Peel the film warm or cold, depending on the film type. Most DTF films today are cold-peel, but check your supplier's instructions. Peel slowly at a low angle to avoid lifting the adhesive from the patch edge.
Step 5: Post-Press
Cover the patch with a Teflon sheet or parchment paper and press again for five seconds. This final press smooths the film and improves wash durability.
Finishing Touches That Sell
A patch that looks professionally finished commands a higher price. After pressing, trim any excess film with sharp scissors or a die-cut machine. For patches with a merrowed border, run a quick stitch around the edge after the transfer is applied. If you are selling to retail customers, consider adding an iron-on backing or a hook-and-loop fastener. These small upgrades turn a plain patch into a ready-to-use product.
Packaging matters too. A clear poly bag with a backing card that explains care instructions adds perceived value. It also reduces returns because customers know how to wash the garment without damaging the patch.
Pricing and Profitability
Patch orders are often small, so your pricing needs to account for setup time. A simple formula is to charge a base fee per patch plus a design setup fee for new artwork. For example, a three-inch patch with a one-color design might cost you $0.60 in materials and two minutes of labor. Price it at $3.50 to $5.00 retail, and you have a healthy margin. Larger orders and repeat designs should get a volume discount, but never price below your material and labor cost.
If you are sourcing dtf transfers near me, compare local pickup options with shipping costs. Local suppliers can cut lead times, which matters when a customer needs patches for an event this weekend.
Common Pitfalls and How to Avoid Them
Even experienced printers run into trouble with patches. Here are the issues we see most often and the fixes.
- Peeling edges: Usually caused by insufficient pressure or a cold patch. Pre-press the blank and increase pressure slightly.
- Film cracking: Happens when the transfer is over-pressed or the patch is stretched during application. Use medium pressure and avoid stretching the patch.
- Color shifting: Small prints amplify color differences. Always proof on the actual patch blank, not on paper.
- Adhesive residue on the press: Use a cover sheet and clean your platen regularly with a press-safe cleaner.
Frequently Asked Questions
Can I use DTF transfers on leather or faux leather patches?
Yes, but with caution. Leather and faux leather can scorch at high temperatures. Lower your press to 280°F (138°C), use a Teflon sheet, and test on a scrap piece first. Adhesion may be slightly weaker, so consider sewing the patch edges for added security.
How do I wash a garment with a DTF patch?
Turn the garment inside out and machine wash cold. Avoid fabric softener and do not tumble dry on high heat. Air drying is best. If the patch is iron-on, you can refresh the adhesive with a quick press after several washes.
What is the smallest detail I can print on a patch?
As a rule, keep lines at 0.5 pt or thicker and text at 6 pt or larger. For very small patches under two inches, simplify the design. Fine details will fill in or become illegible.
Can I print multiple patch designs on one DTF sheet?
Absolutely. Gang sheets are perfect for patch production. Arrange multiple designs on one sheet, leaving a small gap between them for trimming. This reduces waste and speeds up production.
Do I need a special press for patches?
No, a standard heat press works. However, a smaller platen or a press with a quick-release handle can make positioning easier. If you do a lot of patches, consider a dedicated patch press for efficiency.